Last updated: October 21, 2026
Key Takeaways
- Start with a walk-through and a paper checklist before buying anything.
- Grab bars, non-slip surfaces, a shower chair, a raised toilet seat, and better lighting address the main hazards.
- Put grab bars where the hand naturally reaches during sitting, standing, stepping, or turning.
- Set up the shower or tub to cut down on wet standing and extra transfers.
Bathroom safety for older adults starts with the highest-risk spots: the tub or shower, the toilet, the floor, and the lighting. In short: remove slip hazards, add sturdy places to hold, and make every transfer shorter and more visible. That usually means grab bars, a non-slip bath mat, a shower chair, a raised toilet seat, and brighter bathroom lighting. This room-by-room fall prevention checklist for seniors focuses on those changes first.
If the goal is aging in place, the bathroom is the room to fix first. Falls happen fast there because the floor is hard, water is everywhere, and people must step, turn, sit, and stand in a small space. The best changes are the ones that reduce those movements, not just the ones that look safer. I would start with the tub, then the toilet, then the path in and out of the room. This article is a practical checklist that fits the bathroom without turning it into a remodel.
Start with the bathroom hazards that cause the most falls
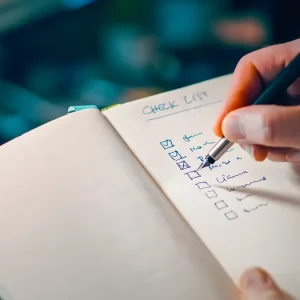
The safest bathroom plan starts with a quick walk-through and a paper checklist. Stand outside the room first, then look at the route a person uses most often: hallway to door, door to toilet, toilet to sink, sink to tub or shower. If the route has a loose rug, a dim bulb, a step over a tub edge, or a toilet that sits too low, that is the first work to do.
Use this order because it gives the biggest return on the least effort:
- Clear the walking path. Remove throw rugs, laundry baskets, and footstools from the floor path. The result you want is a straight route with no loose edges to catch a cane, sock, or slipper.
- Fix the lighting first. Replace a weak bulb with a brighter one that lights the floor, not just the mirror. If there is a night path to the bathroom, add a motion-sensor night light near the doorway and the toilet area.
- Check the floor surface. A bath mat should stay flat and have a non-skid backing. If the mat curls, slides, or bunches, it fails the job.
- Look at the toilet height. If standing up looks like a deep squat, the seat is likely too low. A raised toilet seat or toilet safety frame can shorten that movement.
- Inspect the tub or shower entry. A high tub wall or slick shower floor often means a shower chair and secure grab bars, and an occupational therapist or contractor can help match the setup to the person and the bathroom.
A generic checklist often says “make the bathroom safer” and stops there. That misses the order of work. A brighter light helps a person see the hazard, but it does not stop a fall by itself. A mat helps, but a mat on top of a wet floor can still slide if it has the wrong backing. The right sequence is path, lighting, transfers, then support.
For broader home changes, the hub on [home safety after 60] can sit beside this page, but the bathroom deserves its own pass because the risk is concentrated in one room.
What bathroom changes reduce fall risk for seniors?
The changes that reduce fall risk most are grab bars, non-slip surfaces, a shower chair, a raised toilet seat, and stronger lighting. Those five items work because they reduce slipping, shorten the distance of a fall, and make standing up less demanding. The National Institute on Aging recommends grab bars, non-slip mats, and better lighting for bathroom fall prevention.
For the floor, use a non-slip bath mat inside or just outside the shower or tub. Pick one with a textured backing that stays flat after washing. A mat that is soft but slides is worse than no mat at all. If the bathroom floor itself is smooth tile, a mat can help only in the wettest spots; it does not make the whole floor safe. Keep the mat where feet actually land, not where it looks centered.
For shower and tub access, a shower chair is one of the simplest upgrades. Choose a chair sized for the shower footprint, with rubber tips on the legs and a back if balance is poor. The point is not comfort alone. It lets a person wash while seated, which cuts the number of times they must stand on a wet surface. If the shower is small, the chair may need arms removed or a narrower frame to fit.
For standing and sitting, a raised toilet seat can turn a hard push from low height into a smaller movement. If the person needs side support, a toilet safety frame or properly installed grab bar near the toilet is more useful than a flimsy over-toilet shelf. Shelves wobble, and wobble is the enemy here.
For the tub or shower wall, grab bars belong at the points of effort: where a person enters, exits, turns, or stands. Good bars are fixed into wall framing or installed with proper anchors according to the manufacturer’s instructions. Bathroom towel bars, suction cups, and soap dish grips are not the same thing. They may look helpful, but they are not reliable weight-bearing supports.
Lighting matters because poor visibility turns small hazards into big ones. A person should be able to see the toilet seat, the edge of the tub, and the floor immediately in front of them. If night trips are the main issue, a plug-in night light or motion sensor light can be enough.
According to CDC data, unintentional falls are a leading cause of injury among adults 65 and older. One in four older adults falls each year, so small bathroom fixes can matter.
Install grab bars where the body actually needs support
Grab bars should go where a hand naturally reaches during a sit, stand, step, or turn. A bar beside the toilet, one at the shower entry, and one inside the shower are the usual starting points. The job of the bar is to support body weight during movement, not to decorate the wall.
The most common mistake is placing a bar where it looks symmetrical instead of where the person pulls. A bar mounted too far forward or too low forces awkward reaching. A bar that is too short can leave the user without a second handhold during the hard part of the motion. The result is more twisting, not less.
Use these placement rules as a practical guide:
- Near the toilet, place the bar where the hand can reach while seated and while standing. The person should not need to twist behind the body to find it.
- In a shower, put at least one bar near the entry and one where balance is most likely to shift, such as near controls or at the standing position.
- If the tub wall is high, consider a vertical bar near the entry and a horizontal bar inside, because the body needs a different grip for stepping over than for steadying while standing.
Do not rely on adhesive products for the main support task. They may help with very light guidance in some settings, but they are not the right choice when body weight is involved. That trade-off matters: a cheaper option may cost less today and cost far more if it fails.
Anchoring bars into studs or using hardware rated for the wall type is the usual installation approach, and the manufacturer’s instructions should guide the exact method. If the wall is tile, drywall, or fiberglass, the right mounting hardware changes. If you are unsure of the wall structure, a handyman or licensed contractor can check it before drilling.
The U.S. National Institute on Aging’s bathroom safety guidance and the National Institute for Occupational Safety and Health’s home-fall-prevention materials both support the general principle here: stable handholds matter more than decorative fixtures. If a bar flexes when pulled, it is not ready for use.
How should a shower or tub be set up for daily use?
A shower or tub should be set up so the person can enter, sit, wash, and exit with as few wet standing moments as possible. That means a non-slip surface, a shower chair or transfer bench when needed, grab bars at the entry and inside the stall, and supplies placed within easy reach.
Start with the shower floor or tub floor. If the floor is slick, add a non-slip mat designed for wet use, not a decorative rug. The mat should lie flat and not cover a drain. If the drain area is a slip point, choose a mat size that leaves water flow open while protecting the standing zone.
Then set the chair. A shower chair should fit the stall with enough room for the feet to stay planted. The user should be able to sit down before turning on the water if standing balance is unreliable. That small change often cuts the most dangerous part of bathing: standing naked on a wet surface while reaching for soap.
Place soap, shampoo, and a washcloth within arm’s reach before bathing begins. A caddy or shelf at chest height is safer than bending low or stretching high during the shower. Reaching for a bottle while balancing on one foot is how a small task becomes a fall.
A tub with a high wall may need a different setup than a walk-in shower. In that case, a transfer bench can let a person sit before swinging the legs over the tub edge. It takes more space than a stool, so it is not for every bathroom. The trade-off is clear: if the tub opening is narrow, the bench may not fit, and a different bathing setup may be the better choice.
If the person uses a handheld shower head, place the hose where it will not wrap underfoot. A long hose can tangle around feet or the chair legs if it hangs loose. Keep shampoo bottles off the floor so the user never has to bend down into a wet space.
Toilet safety is about height, support, and clear space
Toilet safety improves when the seat height matches the person’s strength and the area around the toilet has enough room to stand and sit without pivoting sharply. If the toilet feels low, a raised toilet seat or a taller toilet can reduce strain on knees and hips. If balance is uncertain, side support matters just as much as height.
The first check is simple: can the person sit and stand without grabbing the sink, wall, or towel rack? If the answer is no, the toilet area needs support. A towel bar is not a support device. It can pull out of the wall under load. That is an easy mistake and a dangerous one.
A raised toilet seat is useful when the person has trouble lowering or rising from a standard-height toilet. It can reduce the effort needed for each transfer, but it is not always the best answer. Some models sit loosely on the bowl, and a poor fit can create wobble. A more stable raised seat or a full toilet riser with secure attachment is better than a loose add-on that shifts.
A toilet safety frame can help when the issue is lateral balance rather than height alone. It gives the hands a fixed place to push. The downside is space. In a very small bathroom, the frame may crowd the user’s knees or make cleaning harder. If the room is tight, measure before buying or installing anything. The difference of a few inches can decide whether the setup works at all.
Keep the floor around the toilet dry. A small leak, a splash from the sink, or a damp bath mat can undo the benefit of the equipment. If the toilet area is not dry, the next step is to find the water source, not just to replace the mat.
Improve bathroom lighting so hazards are visible at night
Bathroom lighting should make the floor, toilet, and shower edge visible without harsh glare. Good light matters most at night, when people are half awake and moving in a hurry. A bright mirror light that leaves the floor in shadow does not solve the problem.
The simplest upgrade is a brighter overhead bulb or fixture that spreads light across the room. If shadows are still heavy, add a second light source near the door or toilet. A motion-sensor night light works well for late-night trips because it turns on automatically and does not require finding a switch in the dark.
Choose placement carefully. A night light behind the user can cast a shadow across the floor, which hides thresholds and wet spots. A light closer to the path gives better visibility. If the bathroom has a separate switch for the shower light, make sure it is easy to reach without stepping onto the wet floor first.
Avoid glare on glossy tile and mirrors. A very bright bare bulb can make the room harder to use if it reflects off polished surfaces. The goal is even visibility, not a spotlight effect. Frosted bulbs, diffusers, or fixture covers can help reduce harsh reflection.
This is one area where more light is usually better, but only up to the point of comfort. If a person with vision changes feels dazzled by bright light, the fix may be better placement rather than a stronger bulb. A low-light hallway leading to a bright bathroom can also create a vision mismatch, so the lighting path should feel continuous.
Check the room in this order before you call it done
The bathroom is safer when the route, the supports, and the wet areas all work together. The final check should take less than 10 minutes and should be done from the doorway inward.
Use this sequence:
- Walk the path in shoes and in socks. The floor should feel clear, flat, and free of loose edges.
- Turn on the lights as the person would at night. The toilet, tub edge, and floor should all be visible without searching for a switch in the dark.
- Test the main supports by hand, not by body weight. Grab bars should feel solid, and the toilet frame should not wobble.
- Stand up and sit down from the toilet once. The motion should feel controlled, not like a near-fall.
- Step in and out of the tub or shower area. The foot should land on a dry, stable surface, not on a loose mat edge.
The biggest mistake is treating this as a one-time project. Bath safety changes when the person changes. A new cane, weaker knees, an eye prescription change, or a recent illness can make a once-safe setup unsafe again. Recheck the bathroom after any change in mobility.
One last judgment call: this plan is right for most older adults who want to stay in the same home and manage the bathroom more safely. It is not enough for someone who is falling repeatedly, fainting, or unable to transfer without help. In that case, a clinician or occupational therapist should assess the bathroom and the person’s mobility together.
How to Make a Bathroom Safer for Seniors: room-by-room checklist
Bathroom changes that reduce fall risk for seniors are the ones that remove wet surfaces, add fixed handholds, and make each transfer shorter. For many families, the easiest first step is a checklist, a light, and one stable grab bar.
Drafted with AI; not yet reviewed by a person.